companion blog to the e-book the 24/7 Low Carb Diner

Companion blog to the e-book
Available at http://www.247lowcarbdiner.com

Wednesday, January 29, 2014

Among Friends Showcase: Maria's Chicken Sate with Peanut Sauce

The Low Carbing Among Friends team has some wonderful recipes. I have been watching a friend of mine, new to the low carbing way of eating, get so excited about trying the new recipes she is finding on our Facebook page and individual blogs. Those are so valuable to all of us low carbers. But even better are the books. As one of the authors, I can promise that only our very best recipes make it to our cookbooks. They are really an item you should purchase. It is so much easier to work from a book--especially the comb bound versions. But most of all, it shows that you appreciate the efforts we have put into recipe development and nutritional analysis. If you don't have the whole set, you are sooooo missing out. Think about it as an investment in your health. This collection will guarantee you never get bored with your meal plan. We save you hours of pouring over blogs and Pinterest in search of food ideas. Every recipe is a proven winner.

This recipe is a winner for sure. If you want the taste of peanuts and Tamari to explode in your mouth, this is it. It is one of those recipes we would love to order at a restaurant, but know that the traditional fare would be loaded with sugar and possibly even gluten. When we use Maria's recipe we are using wheat free Tamari or Coconut Aminos. We can use the sweetener of our choice. We can buy quality chicken. Better all the way around. This is really simple to put together, except for the threading the chicken on the skewer part. More about that later. Just marinate, grill and serve with that crazy good sauce.

The original recipe is for an appetizer, but we ate them for dinner and lunch. For dinner, I added some vegetables stir-fried in coconut oil. Delish. For lunch, I did the more traditional dipping and added some peppers and a small salad. I have to admit to cheating a little on her instructions. I have this personal aversion to over handling raw meat, so I did not place the chicken on the skewers before cooking. My bad. Sorry to all you traditionalists. I grilled chicken tenders instead, then sliced and skewered them after cooking. Almost the same. Flavor is all there although the sophistication took a hit. So sorry, this blog entry is not intended to be the perfection of the dish. It shows how we really do use the Among Friends cookbooks in our everyday life. What is important? Did we like it? Oh yes. I licked the sauce out of the bottom of the bowl. Hubby wanted more.

Ready to make some Chicken Sate with Peanut Sauce? The recipe is in Low Carbing Among Friends Volume 2 on page 124. If you don't own this book, head just click on the middle book to the right--the kinda pinkish background. Maybe you will be able to skewer the chicken, but even if you don't you are gonna love it.

Sunday, January 26, 2014

Breakfast Bread Pudding in a Jar


I have a new kitchen crush. Canning jars. I am working on the next issue of the Diner News. It will be featuring all sorts of food in a jar. This dish is pretty simple to put together, and despite the name, does not use traditional bread. It takes advantage of the classic Minute Muffin for the base. Then it adds an rum laced egg custard that is a great change of pace. It feels a bit like eating dessert for breakfast! I am giving you the recipe for a single serving, but it would be great in place of your breakfast Multiply Meal you make on prep day. Just line up the jars and fill 'em up.

I used Jamaican Rum flavoring, but maple would also be awesome. Just choose your flavor combo and have fun. You could even make a chocolate Minute Muffin and enjoy a chocolate bread pudding. So many variations are possible. Coconut milk in place of the heavy cream...berries added in...a  tablespoon of pecans...you get the idea?

Breakfast Bread Pudding in a Jar

Bread:
1 pat butter
2 tbsp golden flax seed meal
2 tbsp almond flour
1/4 tsp baking powder
pinch of salt
stevia or other sweetener equal to 1 tbsp sugar
1/2 tsp vanilla
1 egg

Custard:
1 egg
1 tbsp heavy cream
1/4 tsp rum flavoring
stevia equal to 4 tsp sugar
sprinkle of cinnamon
1 pat butter

Using the microwave, melt one pat of butter in a wide mouth half pint canning jar or large ramekin. Add in flax meal, almond flour, baking powder, salt and stevia or other sweetener and egg. Stir until egg is well incorporated into the batter. Cook in the microwave for one minute or until set in the center.* Remove from microwave (careful, the jar will be hot) and use a knife to cut the muffin into bite size chunks while keeping it in the jar. Just cut a grid pattern and then stir a bit.

In a separate small bowl, combine the egg, cream, rum flavoring and stevia or other sweetener. Pour the custard into the jar, carefully coating all the muffin cubes on the top. Sprinkle with cinnamon. Bake at 350 degrees for 15 minutes. Top with an additional pat of butter. Seal the pudding with the lid to the canning jar. Let it cool to room temperature then refrigerate.

Serves 1   362 calories   2 g  net carb     32 g  fat     19 g  protein

Keto:    77%  fat   20%  protein   3 % carb


*Some have asked for oven directions. While I am sure this would work, I have not tried it. I would suggest baking the bread portion at 350 for about 10 minutes. Bake it until it is set but not browned.


This is the muffin fresh from the microwave oven.

I just created this one today, so I am not sure how it freezes. I think it would be fine to freeze, however. I tried it warm from the oven, and while good, I preferred it cold. That is good news for me, since I plan to make these jars to take to school with me. As cold as it has been lately, I just can't make myself get out from under the covers to get a breakfast made. Throwing this little jar in with lunch will be a treat! I will have more breakfast in a jar ideas in the Diner News for February, so look for that coming out on Feb. 1st.
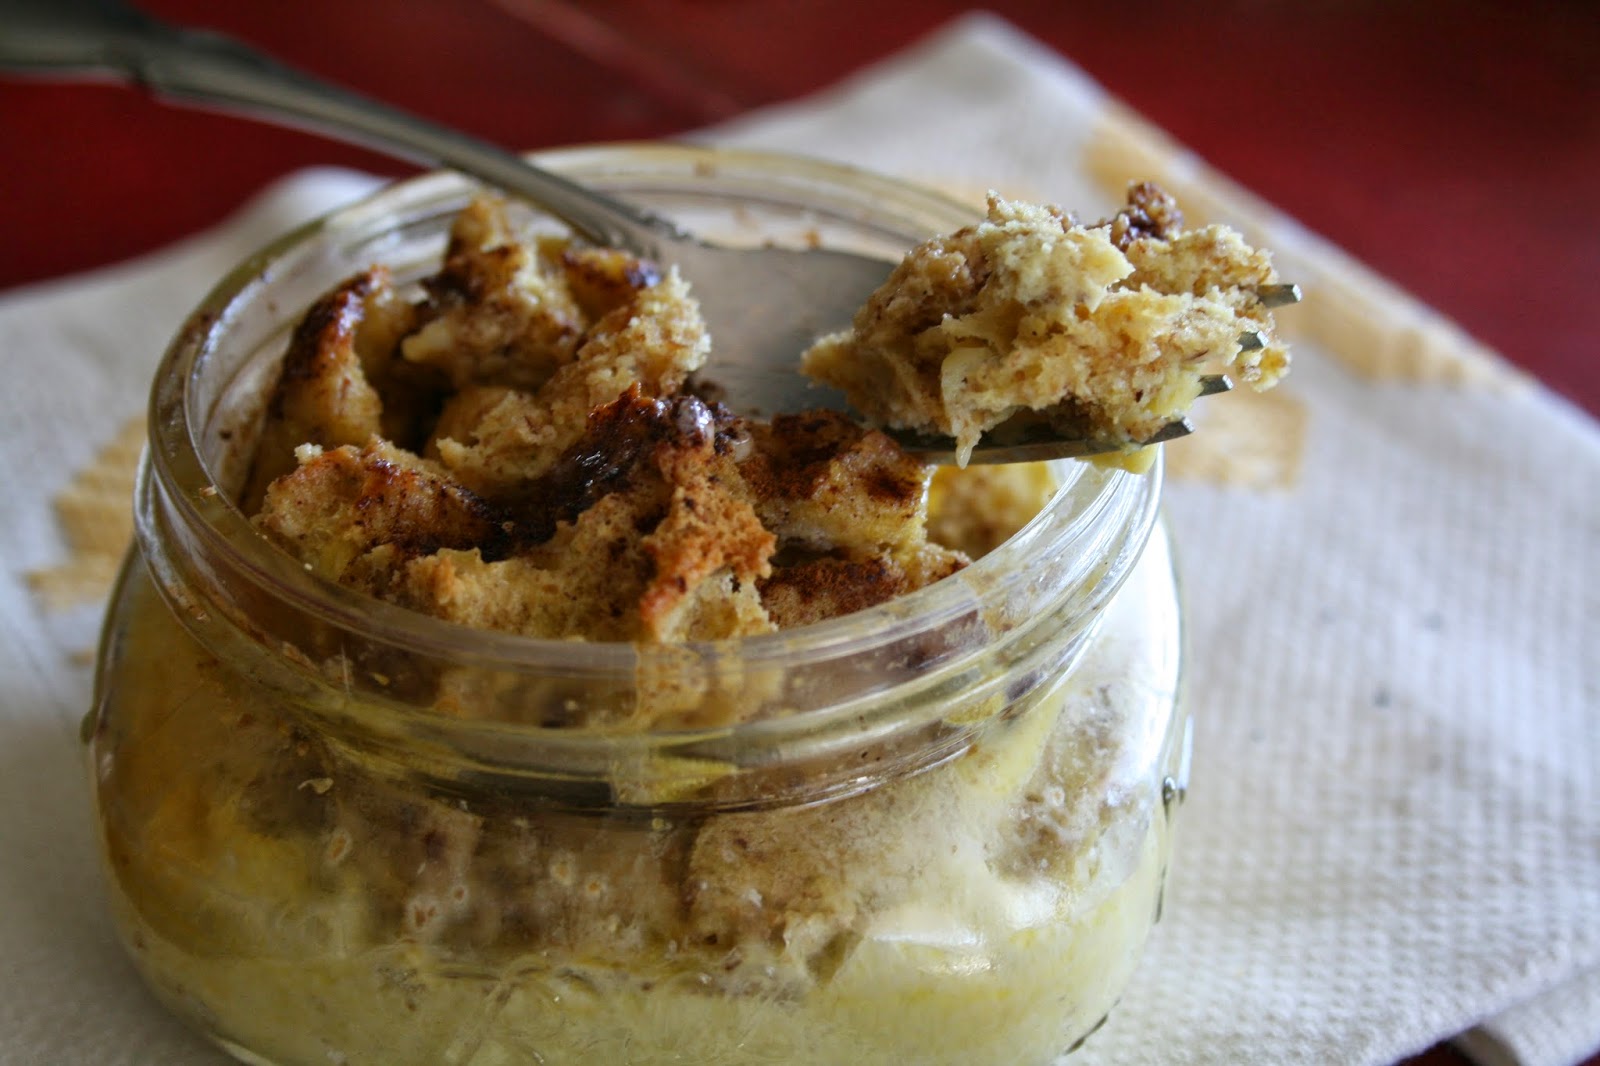

Ready to dig in!

More News too! I am going to do my best to start up my Among Friends features each week. I did that for quite a while back when volume 1 came out. Then I started the school and life got crazy busy. Well, it still is certainly busy, but we have 3 semesters behind us and I do get a break to complete a thought from time to time. I am about to be a true empty nester, as my last boy at home is planning to move in with a former college friend. I am so going to miss him, but not having to prepare the side dishes and other foods for him will give me much more time in the kitchen. I have already made one of Maria's recipes to feature this week, and it was so delicious. Chicken Sate. Be looking for that one.

The authors of the Low Carbing Among Friends series love to hear when people enjoy our recipe creations. It really inspires us to keep going! We share so much of our hard work for free on our blogs. But, the cookbooks are even better and much easier to use in the kitchen. If you appreciate our recipes, you will want the whole collection. Health is the priority, but taste has to be there and these books don't disappoint. If you want to order any volume, just head over to the site. In a new system, I can get credit and a little financial reward when you buy from my personal order page. My earnings help run the school, so you are contributing to a good cause at the same time.


Get more great recipes at the Low Carbing Among Friends Facebook Page: https://www.facebook.com/LowCarbingAmongFriends

Order our books at: 

http://amongfriends.us/24-7-LCD.php

Love the recipes I share on this blog? My ebook helps you plan and prep to stay healthy 24/7.   http://www.247lowcarbdiner.com

Wednesday, January 22, 2014

Game Day Crunchers


I have a son who is a huge football fan. I am a huge pizza fan. I was tempted to name this super flavorful snack "Bronco Bites" after our favorite pro team...who just happen to be headed to the Superbowl. But then knowing that some of you are Seahawk fans, I decided to stay a bit more neutral. Game Day Crunchers will do. Don't just think football party food though, these will be awesome in my lunchbox anytime.

Let me describe the taste. Think pizza. Now think of that little bit of cheese that went over the edge and formed a crispy delicious crisp. Think about those pepperoni pizzas that are filled to overflowing with pepperoni. Know how just a few pieces manage to stick up above the cheese and get a touch of browning? That wonderful crunchiness? That is what these are. I am in heaven.

They are simply pepperoni and cheese. That's it. They are the cousin to the time honored cheese crisps and pepperoni chips, both of which have saved me from many a junk food craving. The difference is that the pepperoni and cheese are in each nugget. You don't have to choose one or the other. I used the food processor to finely chop the pepperoni and cheese, then scooped them out onto parchment.You don't want to eat a lot of these, so don't make too many. Trust me, you will eat them. Even if you hide them from yourself, you will find them... and eat them.


There are three ways to bake these treats. I prefer the oven baking because I have a little bit more control. Oven baked are pictured in the cup in the photo above. They can also do well in a toaster oven on the toast cycle. These stay a little more rounded and are the ones resting on the napkins in the photo above. If you are going for crispy, try the microwave oven version. They are the crunchiest, but also the easiest to burn. Directions below:

Game Day Crunchers

24 pepperoni slices
1 cup Italian blend cheese shreds

In a food processor, add the pepperoni and cheese. Process on pulse until the pepperoni is finely chopped and mixed in well with the cheese. Drop mixture by teaspoons onto parchment. Choose your cooking method.

Oven - Place parchment on a cookie sheet and bake 5 -6 minutes at 400 degrees. Remove from oven and let cool.

Toaster oven - Place the parchment on the oven pan. Scoop 6 mounds of the mixture onto the parchment. Using the toaster function, use two cycles. Remove from oven and let cool.

Microwave - Place parchment directly on the rotating plate. Add scoops of the pepperoni mixture at least one inch apart. Heat at full power 25 seconds. Check for doneness. Some may cook faster than others, so remove the browned Crunchers and cook the others for an additional 5 seconds. Ovens may vary, so try a test batch at 25 seconds and adjust your time from there. Larger batches may take a bit longer. I baked 6 at a time.

Makes about 24 Crunchers.
A serving of 3 Crunchers has <1 g carb,  60 calories,  5 g fat,  4 g protein 

I know that packaged shredded cheese has some starch to prevent the cheese shreds from sticking to each other. If you shred your own cheese, the mixture will be much stickier my test batch, so the outcome could be a little different. It may work just as well, I just haven't tried it to be sure. Let me know if you try.

Feel free to double the recipe here. Just store the extras under lock and key. If you are a pizza lover like me, self control is a definite problem with these. They are very flavorful and rich. A must bring treat if your Superbowl party features pizza. You will not feel deprived. But beware, carbivores are gonna want to devour these too.

Update: I have since made a batch with a different cheese. Using a pre-shredded Monterey Jack made the crunchers require a little more time to cook. For this version, adjust the cooking times. Mine took about 30 seconds in the microwave oven. These were very crunchy. A large batch could take longer. I suggest watching them closely and cooking until  you see them start to smoke. Turn the oven off immediately. Let them cool to check the crunch factor. If you want them a little crunchier, send them back for another 10 seconds. Ovens may vary, so feel free to play until you find the sweet spot for your microwave and your brand of pepperoni and cheese.

The oven time increased about 2 minutes, up to 8 minutes. The oven variety are not as crunchy as the microwave version. The toaster oven instructions seem to be the same. Two cycles of toasting resulted in delicious snack bites. Choose whatever works for you.

If you prefer less fat--they do release a lot of oil on the parchment--use turkey pepperoni. It is also much less salty. With the turkey pepperoni, the snackers are not as crisp, but still tasty.


Love the recipes I share on this blog? My ebook helps you plan and prep to stay healthy 24/7.   http://www.247lowcarbdiner.com

Get more great recipes at the Low Carbing Among Friends Facebook Page: https://www.facebook.com/LowCarbingAmongFriends

Order our books at: 

http://amongfriends.us/24-7-LCD.php

Wednesday, January 15, 2014

Chicken Pizzoli


This delicious lunch, via the January Diner News, will make all cravings for pizza disappear. But you won't need to fuss with making a complicated, time consuming crust. Basically, this is a ground chicken patty topped with sauce, cheese and your favorite veggies. Simple and so easy to have the chicken patties frozen and waiting for fresh toppings.

I like to grind my own chicken, so it makes sense to do a big batch of these at a time.

Chicken Pizzoli

8 oz ground chicken
2 tbsp olive oil
1/4 cup tomato sauce
1 tsp garlic powder
12 slices pepperoni
1/2 cup mozzarella cheese
1/4 cup green bell pepper, diced
8 white mushrooms, sliced

On a parchment lined cookie sheet, press chicken into 2 1/4th inch thick circles. Brush with olive oil. Bake for 10 minutes at 350 degrees. While that is baking, combine tomato sauce and garlic powder. Remove chicken from oven and coat with tomato sauce. Top with pepperoni, peppers, mushrooms and cheese. Return to the oven for an additional 5 minutes. Serves 2.

475 calories
36 g fat     34 g protein     6 g carbs


If you want even more flavor, you can add some herbs and garlic to the ground chicken before cooking. Or if you are doing the big batch of patties, go with less flavoring for more versatile dress ups.

Love the recipes I share on this blog? My ebook helps you plan and prep to stay healthy 24/7.   http://www.247lowcarbdiner.com

Get more great recipes at the Low Carbing Among Friends Facebook Page: https://www.facebook.com/LowCarbingAmongFriends

Order our books at: 


http://amongfriends.us/24-7-LCD.php

Sunday, January 12, 2014

Peppers Monterey


Stuffed peppers with a south of the border flair. Oh yes, please. These are so adaptable, so pretty, and so good for you! I say adaptable because you can vary the stuffing to be a little heavier on protein or fat by adding more chicken and cheese. You can go lighter on carbs by eating only a half of the pepper and mounding the chicken stuffing. You can go paleo by leaving the cheese out. Go keto by keeping the protein a little lower with less chicken and replacing the tomatoes and with some avocado chunks. See what I mean by versatile?

I am eating keto, so I had an all protein and fat breakfast (Maple's Meatballs) so I could use my carbs on the veggies in this meal today. Since it is the weekend, I am eating my big meal for Sunday Dinner--I am eating a whole stuffed pepper. Oh my is it worth it!


Now the chicken is wonderful, but if you are making this from scratch, it will be a little time consuming since my stuffed peppers start with cooked chicken. I know all the Diners like shortcuts, so be smart and make the Salsa Chicken into a Triple Play Meal. I prepared a couple pounds of chicken breast in the crockpot Friday night. Just the chicken plus a few taco spices and a cup of chunky salsa. Let it cook on low all night. Turn it off when you get up. Let it cool a bit and shred it with a couple of forks. Don't drain it. The shredded meat will probably absorb the liquid. Depends on if or how much solution was added to your bird. I hate that some producers do that. All about profit.(insert rant) But back to the chicken, let it rest a few minutes after shredding. If any liquid remains, you can drain that off. Mine from Sprouts absorbed it all. Add salt to taste and separate the chicken for different recipes. If you are starting from raw chicken, take about 3 oz. per serving, cover the chicken with salsa and bake until done in the center. Or use, any leftover cooked chicken and stir in some salsa. In other words, get yourself some shredded chicken no matter how you have to do it. JUST DO IT.

Peppers Monterey


3 bell peppers, any color
3 cups raw cauliflower florets
2 tbsp coconut oil
1 tsp minced garlic
1/2 tsp salt
4 tbsp thick salsa, divided use
9 oz shredded Salsa Chicken, warmed
3 oz Monterey Jack cheese
6-8 grape tomatoes, quartered or halved

Cut the tops off the bell peppers and remove the seeds and membranes. Arrange them in a snug casserole dish. Use the tops to help sturdy them if they wobble.

In a food processor, chop the cauliflower until fine like rice. In a skillet, heat the coconut oil. Add the cauliflower and saute for 5 minutes. Add the garlic and 1 tbsp of salsa. Saute another 5 minutes. Add salt to taste. Place a large spoonful of the cauliflower into each pepper. Top with an ounce of chicken. Add a sprinkle of cheese, some tomatoes and a bit of salsa. Repeat the layers until all the ingredients are used, reserving a sprinkle of cheese to add at the end of baking.

Place the peppers in a preheated 350 degree oven for 35-45 minutes, depending if you prefer a slight crunch to the pepper, or a softer texture. Add a sprinkle of cheese to the top. Slice in half to serve.

To serve 6: 220 cal.  5 net carb   16 g fat   14 g protein
To serve 3: 440 cal   9 net carb   32 g fat    28 g protein


If you would rather lower the carbs and up the protein, just add some extra chicken. Slice the peppers in half before stuffing and lay them on their sides to stuff, mounding the chicken and cauliflower mixture.

Now what to do for the other two meals for the Triple Play? Get creative.

  • This chicken is amazing on scrambled eggs topped with avocado. (Had that yesterday)
  • You could also make an almost instant south of the border soup by adding it to a can of chicken broth, a selection of low carb veggies and a can of Rotel tomatoes. I like to add a hunk of cream cheese to make it creamy.
  • Southwest chicken salad is great. Just add it to mayo, celery, bell pepper, cheese and some jalapeno peppers. Scoop that on a bed of lettuce and lunch is served.
  • Finger food! Blend in some cream cheese and diced green chilies. Form into balls and roll in pepitas.
  • Mini Stuffed peppers--split mini peppers in half. Fill with the chicken and cheese. Broil a few minutes for a wonderful treat.

Love the recipes I share on this blog? My ebook helps you plan and prep to stay healthy 24/7.   http://www.247lowcarbdiner.com

Get more great recipes at the Low Carbing Among Friends Facebook Page: https://www.facebook.com/LowCarbingAmongFriends

Order our books at: 

http://amongfriends.us/24-7-LCD.php

Wednesday, January 8, 2014

Maple's Meatballs

This is a really old recipe of mine. I love the combo of savory meat with a touch of sweet maple flavor. I was always one to dip my bacon or sausage in my pancake syrup. This is part of my keto plan, and a recipe I included in the January Diner News. Let me warn you--the house smells amazing when you make these.

Here's my keto version from the newsletter:

Maple’s Meatballs

1/2 lb pork sausage (or plain ground pork)
1/2 lb ground beef
1 tsp maple flavoring
2 tbsp granulated sweetener

Mix all ingredients. Form into 10 balls and bake 25-30 minutes at 350 degrees.

Serves 5. Eat one serving: wrap and freeze the rest.

235 calories
19 g fat        14.6 g protein        >1 g carb

Add a coffee or tea with cream for another
100 calories, 10 g fat  and 1 g carb


When you grow tired of eggs for breakfast, this is a nice change of pace. They go great alongside a Minute Muffin or pancakes if you aren't watching your percentages. Even plain, the sweetness hits the spot.

Who says meatballs aren't for breakfast? I love them, but they are also good for lunches and party food--maybe the superbowl?

Love the recipes I share on this blog? My ebook helps you plan and prep to stay healthy 24/7.   http://www.247lowcarbdiner.com

Get more great recipes at the Low Carbing Among Friends Facebook Page:  https://www.facebook.com/LowCarbingAmongFriends

Order our books at: 

http://amongfriends.us/24-7-LCD.php

Monday, January 6, 2014

Keto Menu Planning Sheets


Call me old fashioned. I am a paper planner. Notes on my computer don't do it for me and I don't have a smart phone for all those cool apps. I use my software to gather all my nutrition data, and My Fitness Pal for some things, but I still just like paper. For one thing, once I have a day filled out with balanced carbs, fat and protein, I can use it again and save my time logging in my menu. I have never been very good at keeping a food diary. Ugh. I am really trying--no resolution mind you--to do the Keto plan and watching my ratios. Getting in higher fat while limiting calories takes a lot more planning than I am accustomed to. I can eat low carb and cruise along fine, but I don't lose weight. To drop pounds, I have to be far more careful. These planners are helping me. I thought they might help you too, so I am adding the link to Google Documents. Feel free to use them if they help. The one above is for a single day--breakfast, lunch and dinner. Once I plan my three meals, I see if I have room for a treat. It might be a fat bomb. It can be something like a little protein boost. My favorite there is a spoonful of nutbutter. I also add some freebies--so far that is dessert tea or some stevia sweetened gelatin.


The second is a template for individual meal cards. Once I mass a collection of keto approved meals, I can use the cards interchangeably to build daily menus. There is a place for all parts of the meal, but a soup or casserole will work too. I included a box for the source of the recipe too, be it a blog site, one of our cookbooks, or any other web source. I am thinking this much planning in the early weeks is going to save massive amounts of time and frustration later on. I am very hopeful that this is going to work for me. My metabolism is such a challenge at my age...plus, as a cancer survivor myself and with a family history of dementia among the older females, this way of eating just makes sense. I now see that I have been eating way too much protein and even too many vegetable carbs to be at my optimal health. John is not being as strict with proportions, but will be eating the same foods, so we will see how this goes. The 24/7 Low Carb Diner News January issue features daily menus and recipes I have already made up. Great for starters!


Cards:      https://docs.google.com/file/d/0B-NK58XyHuI7WUllX3ZMMkVHZ3M/edit


Let me know if you have any suggestions, these forms are a work in progress and I am a relative newby at counting!

Friday, January 3, 2014

New Year's Cheesecake

Time for one last decadent treat! (Although this does fit into Keto proportions if you do dairy and sweets) This is the cheesecake I made for my oldest son and the rest of the family for our New Year's Day celebration. I partied too late in the night, so I had to get up early to make one before everyone else got out of bed. My accountant son did beat me awake anyway, but that just gave us some one on one time in a quiet house. That was nice. Because my old springform pan is bent and doesn't seal too well, I went in search for a recipe that didn't need a waterbath. My daughter-in-law wanted a New York style, so I tried altering this recipe from Brown Eyed Baker that claimed no waterbath was necessary. The theory is that a quick high temperature bake followed by a long low heat bake results in a creamy cheesecake that stays moist without the bath. No promises concerning the cheesecake connoisseur's dilemma concerning possible cracks. Mine had not cracked while it was still warm from the oven, but it did crack on the way to my mom's house. Oh well. I just didn't have time to let it chill before we had to go. Everyone agreed that it tasted wonderful, and it was so nice not needing to mess with the water bath and all that foil! I heard recently that cracks may be caused by too much whipping of the eggs, so you might choose to go easy there and see what happens....just a thought from a girl whose day is not wasted by a crack in dessert.

The initial high heat--500 degrees--will leave this cheesecake a little brown on top, so don't try this method if that bothers you. The original author says you may want to check it and add some foil if it is getting too brown. Don't add it at first though, or the cheesecake doesn't cook correctly. This recipe is not as dense as the other New York Style cheesecakes I have made in the past. It has quite a few eggs, so that adds to the lighter texture I think. I even used one less than the model recipe. I think I would always use one less egg, because the texture is very nice. I also opted for an almond meal crust.

I used my sample of sucralose and erythritol blend granular sweetener from Natural Mate. I couldn't find the granular on sale yet at Amazon, but the concentrates are there. Hopefully, this will be available very soon. It measures 2 times as sweet as sugar and blended in very well. Everyone liked the sweetness and did not even notice it was not made with sugar...and yes, I quizzed them on that one!

It makes a large cheesecake--9 inch springform and 5 packages of cream cheese. That will feed a crew! At our house, cheesecake is often subbed for birthday cake, so all is good. In fact, I still have some leftovers to finish up before we hit the keto plan for the new year.

New Year's Cheesecake

Crust:
1 cup coarse unblanched almond meal
5 tbsp butter, melted

Filling:
5 (8 oz) blocks cream cheese, softened
sweetener equivalent to 1 1/2 cup sugar
1/2 tsp salt
1/4 cup heavy cream
2 tsp lemon juice
2 tsp vanilla extract
2 egg yolks
5 eggs

Preheat the oven to 350 degrees F. In a medium bowl, melt butter. Stir in the almond meal and mix until the nuts are moist. Press into the base of a 9 inch springform pan. Butter your fingers to rub an inch along the base edge of the spring form pan. Bake for ten minutes. Remove crust from oven and change the oven temperature to 500 degrees.

In a large mixing bowl, beat the cream cheese until fluffy. Incorporate the sweetener 1/4 cup at a time. Add in the salt, cream, lemon juice and vanilla. Beat for 2 minutes. Add the egg yolks and beat until incorporated. Add the eggs, one at a time, continuing to beat between additions.

Pour the cheesecake mixture into the pan. Smooth the top and tap for air bubbles. Bake on a lower middle rack of the oven for exactly 10 minutes. At the ten minute mark, turn the heat down to 200 degrees. Do not open the door. Bake for 1 1/2 hours. If top is browning too much, place a foil guard loosely around the edges. Remove from oven. The cheesecake should be firm around the outer edges and still slightly jiggly in the center. Let cool for 5 minutes, then run a knife along the edge to loosen it and help prevent cracking. Let cool at room temperature for an hour, then transfer to the refrigerator for several hours.

Serves 16
357 calories     35 g fat    4 net carbs   7 g protein

This is creamy and delicious even without the fruit topping. The nut crust is perfect. Everyone loved it. Don't wait for another New Year Celebration.

Love the recipes I share on this blog? My ebook helps you plan and prep to stay healthy 24/7.   http://www.247lowcarbdiner.com

Get more great recipes at the Low Carbing Among Friends Facebook Page:  https://www.facebook.com/LowCarbingAmongFriends

Order our books at: 

http://amongfriends.us/24-7-LCD.php